Lead Instructor
Adam Berger - Advanced expert with 20+ years of experience in virtual worlds
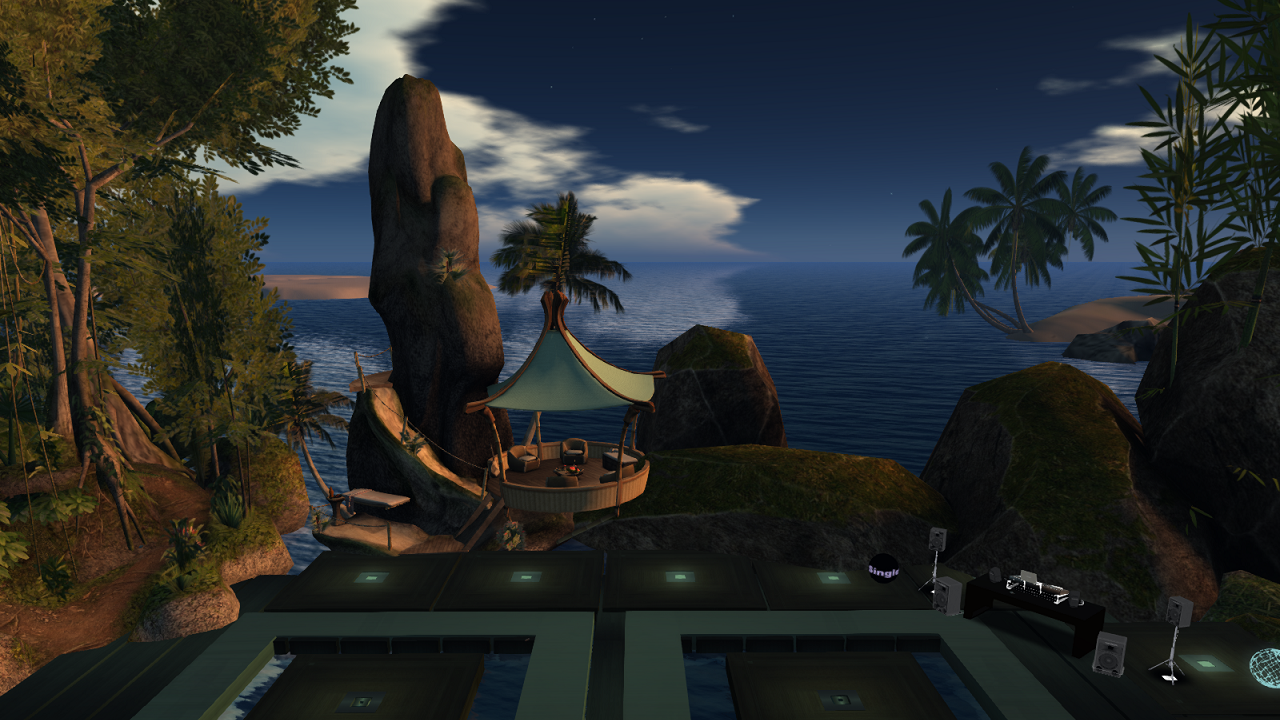
All classes take place in Alife Virtual World at our dedicated Alife Virtual School region
Virtual Photography & Machinima - Complete Guide
Learn and Grow at Alife Virtual World School
Course Code: ART-501 | Part of The School of Digital Arts
Master the art of capturing stunningly beautiful screenshots and compelling videos within Alife Virtual. This course takes you from basic snapshots to professional-grade virtual photography and introductory machinima, all using the powerful tools available in the Firestorm Viewer.
Course Details
- Difficulty Level: Intermediate
- Lead Instructor: Adam Berger
- Environment: Alife Virtual World (OpenSim)
- Required Viewer: Firestorm Viewer
- Prerequisites: Basic avatar control and interface navigation in Alife Virtual.
Our Expert Instructors
Our courses are led by a team of dedicated educators, each with over 20 years of continuous experience building, scripting, and managing communities in virtual worlds. You are learning from pioneers of the metaverse.
Adam Berger, our building and mesh expert, will be your primary guide on this visual journey.
1. Course Overview
Welcome, future virtual artist! This comprehensive course is designed to unlock your creative potential and teach you how to see the virtual world through a photographer's lens. The line between a simple "screenshot" and a breathtaking "photograph" is technique. We will deconstruct those techniques, giving you full control over the camera, light, and focus to create images and videos that tell a story and evoke emotion.
Your instructor, Adam Berger, is an advanced expert in building with prims and meshes. His deep understanding of object creation, texturing, and scene composition provides a unique and invaluable perspective for virtual photography. He knows how to build the perfect scene and, more importantly, how to capture it perfectly.
What You Will Master:
- Complete Camera Control: Go beyond the default avatar view. You will learn to precisely position, pan, zoom, and orbit your camera to find the perfect angle for any shot.
- The Power of Light: Master the Environment Editor (EEP) to control the sun, moon, and ambient light. Learn to use local light projectors to create dramatic, studio-like lighting effects.
- Depth of Field (DoF): Create professional-looking portraits and macro shots by controlling focus and blurring the background, drawing the viewer's eye exactly where you want it.
- Composition Techniques: Understand and apply fundamental art principles like the Rule of Thirds, leading lines, and framing to create balanced and visually appealing images.
- Machinima Fundamentals: Learn how to record smooth, high-quality video clips directly within the viewer, opening the door to creating short films, tutorials, and cinematic sequences.
- Firestorm Phototools Mastery: Become an expert at using the powerful, all-in-one Phototools floater to streamline your creative workflow.
Lesson 1: The Photographer's Eye - Mastering Your Virtual Camera
In our first lesson, we break free from the camera's default behavior. We'll learn how to detach it from our avatar and move it anywhere we wish, exploring the fundamental controls that form the bedrock of all virtual photography.
Theory: Your Camera is Your Brush
In the real world, a photographer physically moves their body and their camera to frame a shot. In a virtual world, we have even more freedom. We can fly, clip through objects (with the right settings), and place our camera in positions impossible in reality. Understanding the two primary camera modes is crucial:
- Avatar View (Default): The camera follows your avatar. It's great for navigation but restrictive for photography.
- Free Camera Mode: By holding Alt or using the Camera Controls floater, you decouple the camera from your avatar. This is where the magic begins. You can now orbit, pan, and zoom independently.
We will also introduce a core principle of composition: The Rule of Thirds. Imagine your screen is divided into a 3x3 grid. The rule suggests that placing key elements of your scene along these lines, or at their intersections, creates a more engaging and balanced composition than simply centering the subject.
Step-by-Step: Taking Control of Your View
- Accessing Camera Controls: The main tool for this lesson is the Camera Controls floater. Open it by navigating to the top menu:
Avatar > Camera Controls. Alternatively, you can use the keyboard shortcut Ctrl + Alt + P to open the comprehensive Phototools floater, which includes these controls. For now, let's focus on the basics. - The Alt-Zoom Technique: This is the most intuitive way to start.
- Hold down the Alt key on your keyboard.
- Click and hold your left mouse button on your subject (e.g., another avatar, a building).
- While holding both, move your mouse left and right to orbit around the subject.
- Move the mouse up and down to zoom in and out.
- Use your mouse scroll wheel to also zoom in and out smoothly.
- Panning and Dollying: For more precise movements, we use a combination of Alt, Ctrl, and Shift.
- Pan (Move Sideways/Up/Down): Hold Ctrl + Alt, then click and drag your mouse. The camera will slide across the scene without changing its angle.
- Dolly (Move Forward/Backward): Hold Shift + Alt, then click and drag your mouse up or down. This is a more controlled way to move the camera forward and back than zooming.
- Using the Camera Controls Floater: The dedicated window gives you buttons and sliders for these same actions. Experiment with the zoom, orbit, and position controls in the floater to see how they correspond to the keyboard shortcuts. This is great for making very small, precise adjustments.
- Resetting Your View: If you get your camera into a strange position and want to return to your avatar, simply press the Esc key. This will snap the camera back to the default view behind your avatar.
Key Concepts to Remember:
- Orbit: Moving the camera in a circle around a focal point.
- Pan: Sliding the camera left, right, up, or down without changing its rotation.
- Zoom vs. Dolly: Zooming changes the camera's Field of View (like a lens on a real camera), while dollying physically moves the camera closer or further from the subject. Dollying often produces a more natural-looking result.
- Rule of Thirds: Use the Phototools Composition Grid (
Phototools > Composition tab) to overlay a 3x3 grid on your screen to help practice this rule.
Lesson 2: Painting with Light & Focus - Advanced Phototools
Now that you can position your camera, it's time to learn how to control what the camera "sees." In this lesson, we dive into two of the most powerful features for creating artistic photos: Depth of Field (DoF) and advanced lighting controls.
Theory: Creating Mood and Focus
Depth of Field (DoF) is the effect that keeps your subject sharp while blurring the foreground and/or background. It's a hallmark of professional photography. In virtual worlds, it serves two purposes: it mimics a real-world camera lens, adding realism, and it powerfully directs the viewer's attention to your intended subject, separating it from a potentially "busy" background.
Lighting is everything in photography. It sets the mood, defines shapes, and creates drama. The default daytime lighting in Alife Virtual is functional but often flat. By taking control of the Environment Settings (often called EEP, for Environment Enhancement Project) and using light projectors, you become a virtual lighting director, able to create any mood from a bright sunny afternoon to a dark, moody film noir scene.
Step-by-Step: Sculpting Your Scene
- Enabling Advanced Lighting and DoF: These are graphically intensive features. First, you must enable them.
- Go to
Me > Preferences > Graphics. - On the main "General" tab, move the Quality slider to High or Ultra. This is a prerequisite.
- Click the "Advanced Lighting Model" checkbox to enable it. Your screen will likely refresh.
- Now, check the "Depth of Field" box. The world will likely become blurry. Don't panic!
- Click "OK" to save the settings.
- Go to
- Controlling Depth of Field: The easiest way to control DoF is through the Phototools floater.
- Open Phototools (Ctrl + Alt + P).
- Go to the "DoF/Glow" tab.
- The most important setting is "Focus Point." Simply left-click on the object or avatar you want to be in focus. You should see the scene snap into focus at that point, with the foreground and background blurring.
- The "F-number (f/x)" slider controls the *amount* of blur. A lower F-number (like f/2.8) creates a very shallow depth of field with lots of blur. A higher F-number (like f/16) keeps more of the scene in focus.
- The "Blur Factor" slider is a simple multiplier for the overall blur effect. Start with the F-number and fine-tune with the Blur Factor.
- Manipulating Environment Light (EEP):
- In the Phototools floater, go to the "Light" tab. This is a simplified interface for the full Environment Editor.
- Use the "Sun/Moon Position" dial to change the time of day. Notice how the direction and color of the shadows change dramatically. A low sun creates long, soft shadows, perfect for golden hour shots. - Experiment with the "East Angle" to control the sun's horizontal position.
- The "Ambient" color swatch controls the color of the light in the shadows. Changing this can create powerful moods (e.g., a dark blue for a night scene).
- Creating a Light Projector: This is like adding a studio light to your scene.
- In the Phototools "Light" tab, click the "Create Projector" button. A light source object will appear.
- You can move this projector around just like any other object. Position it to highlight your subject.
- With the projector selected, use the controls in the Phototools window to change its Color, Intensity, Radius (how far the light travels), and Falloff (how quickly the light fades).
- You can create multiple projectors for complex lighting setups (e.g., a key light, a fill light, and a backlight).
Practical Examples:
A simple portrait where the avatar and the background are equally in focus. The lighting is flat and uniform. The image is clear, but not very artistic.
The same portrait, but DoF is used to blur the background, making the avatar pop. A light projector is placed to the side to create highlights on the face and hair, adding depth and drama.
Lesson 3: Bringing Your World to Life - Introduction to Machinima
With your mastery of camera work and lighting, it's time to add the dimension of motion. Machinima (machine + cinema) is the art of making movies in virtual worlds. In this lesson, we'll cover the fundamentals of recording video in Firestorm and the best practices for creating compelling short films.
Theory: The Director's Chair
Good machinima is more than just hitting "record." It requires planning and a director's mindset. Before you even start recording, think about:
- The Story: What do you want to show? Even a 10-second clip should have a purpose. Is it an avatar walking thoughtfully? A sweeping scenic shot? A dramatic entrance?
- Camera Movement: Static shots are fine, but camera movement adds dynamism. Common movements include:
- Pan/Tilt: Pivoting the camera left/right or up/down from a fixed point.
- Tracking Shot: Moving the camera alongside a moving subject.
- Crane Shot: Moving the camera vertically up or down.
- Post-Production: The raw video file from the viewer is just the beginning. Basic editing, like trimming clips, adding music, and creating transitions, is done in external video editing software. Many powerful, free options exist, such as DaVinci Resolve, Kdenlive, or Shotcut.
Step-by-Step: Recording Your First Machinima
- Opening the Movie Recorder: Firestorm has a built-in video recorder. Access it from the top menu:
Avatar > Movie Recorder. The recorder toolbar will appear at the bottom of your screen. - Configuring Settings (Before Recording):
- Click the wrench icon on the recorder toolbar to open the "Video recording settings" window.
- File Path: Choose where you want to save your video file. It's highly recommended to save to a fast drive (like an SSD) to prevent lag during recording.
- Frame Size: This is your resolution. 1920x1080 (1080p) is a standard for HD video. If you experience lag, you can try 1280x720 (720p).
- Frame Rate (FPS): This determines the smoothness of the video. 30 FPS is standard. 60 FPS is smoother but more demanding on your computer.
- Quality: A higher quality setting will result in a better-looking video but a much larger file size. Start with a medium setting and experiment.
- IMPORTANT: Make sure "Interface" is UNCHECKED. You do not want your mouse cursor, chat windows, or UI elements in your final video!
- Preparing Your Shot: Before you hit record, get everything ready.
- Set up your lighting and DoF as learned in Lesson 2.
- Position your camera for the starting frame of your shot.
- Hide the user interface by pressing Ctrl + Alt + F1. Press it again to bring the UI back.
- Recording the Clip:
- Press the red record button on the Movie Recorder toolbar to start recording. A frame counter will appear.
- Perform your camera movement. For a smooth tracking shot of a walking avatar, use the arrow keys to move your avatar forward while simultaneously using the camera pan controls (Ctrl + Alt + drag) to keep them in frame. This takes practice!
- Press the record button again to stop recording. The video file will be saved to your chosen location.
Best Practices for Clean Machinima
- Practice Your Moves: Rehearse your camera movements several times before you hit record. Smooth, deliberate movements look far more professional than jerky, uncertain ones.
- Hide Everything: Double-check that all UI elements are hidden. This includes your avatar's name tag (can be disabled in Preferences) and any active floaters.
- Keep Clips Short: It's better to record several short, well-executed clips and edit them together later than to try and film one long, perfect take.
- Mind Your Shadows: When recording, ensure "Shadows" are enabled in your graphics settings. Moving shadows from a controlled sun add immense realism to your scene.
- Audio is Half the Experience: Firestorm's recorder does not capture in-world sound. All sound effects and music are added later in a video editor. This gives you full creative control over the audio landscape of your film.
5. Hands-On Exercises
Theory is one thing, but practice is what builds skill. Complete these exercises in the Alife Virtual School region to apply what you've learned. Feel free to use the campus buildings, gardens, and sandbox areas as your subjects.
Exercise 1: The Perfect Portrait
Find a scenic spot and pose your avatar. Your task is to take a portrait that uses Depth of Field effectively.
Instructions: Enable Advanced Lighting and DoF. Use the Phototools to focus on your avatar's face. Adjust the F-number until you have a nicely blurred background. Experiment with sun position to light your avatar's face from the side. Take the shot.Expected Outcome: A sharp, well-lit portrait of your avatar where the background is artistically blurred, making your avatar the clear focal point.
Exercise 2: Landscape Artist
Capture a wide, beautiful landscape shot of the Alife Virtual School campus.
Instructions: Fly up to get a good vantage point. Use the Phototools Composition Grid to apply the Rule of Thirds (e.g., place the horizon on the bottom third line and a key building at an intersection). Adjust the sun position to the "golden hour" (low in the sky) to create long shadows and warm light. Take the shot.Expected Outcome: A well-composed landscape photo with dramatic lighting and a strong sense of depth and scale.
Exercise 3: Film Noir Scene
Create a dark, dramatic, high-contrast scene using only a light projector.
Instructions: Find or create a dark area (you can use a skybox or go inside a building). Set the environment lighting to be very dark (midnight). Create a single light projector. Position it to cast strong light and sharp shadows on your subject (your avatar or an object). The goal is "low-key" lighting, where much of the scene is in shadow.Expected Outcome: A moody, high-contrast black and white or desaturated color photo that relies on a single light source for drama and definition.
Exercise 4: The 15-Second Story
Record a short machinima clip of your avatar performing a simple action with a dynamic camera movement.
Instructions: Plan a simple shot: your avatar walks from point A to point B. Set up your starting camera position. Hide the UI. Start recording. As your avatar walks, perform a smooth tracking shot to follow them. Stop recording after about 15 seconds. Review your video file.Expected Outcome: A smooth, 10-15 second video clip with no UI elements, where the camera follows the avatar's movement in a cinematic way.
6. Troubleshooting Guide
Even the pros run into technical glitches. Here are solutions to some common problems you might encounter.
- Lower Draw Distance: Go to
Preferences > Graphics > Generaland lower your Draw Distance. Rendering fewer objects frees up resources. - Reduce Other Settings: In the same graphics panel, lower settings like Mesh Detail, Avatar Complexity, and disable Shadows if you're not actively using them for a shot.
- Close Other Programs: Ensure no other demanding applications (like web browsers with many tabs, games, or video software) are running in the background.
- Update Graphics Drivers: Ensure your graphics card drivers are up to date from the manufacturer's website (NVIDIA, AMD, or Intel).
- Advanced Lighting Model is Off: DoF requires the Advanced Lighting Model to be enabled first. Double-check that it is checked in
Preferences > Graphics. - Camera is too close to focus point: DoF effects are most noticeable when there's significant distance between your focus point and the background. If everything is close together, the effect will be minimal.
- Viewer Restart: Sometimes, graphics settings don't apply correctly until the viewer is restarted. Try logging out and back in.
- Focus Not Set: In the Phototools, make sure you have actually clicked on a point in the world to set the focus.